If you’ve just moved into a new place or are tackling a fixer-upper DIY project, installing shelves is one of the best ways to maximise your space while adding a personal touch. Whether you’re looking to display your tools, books, or collectables, shelves can elevate both functionality and style in any room. And with help from our experts here at Smiths Hire and our handy tool hire services, you’ll have everything you need to tackle this project with confidence! Today, we’re breaking down the essentials for DIY shelf installation so you can get cracking on making your space your own.

Tools you’ll need
Before you get started, you’ll need to gather the right tools for the job. Every DIY will have a different set of tools to go with the method, but generally speaking, when it comes to putting up shelves, you don’t need too many, and the list is pretty basic. If you frequently build things DIY or fancy yourself quite handy when you need to be, you probably have most, if not all, of these in your toolkit already!
You’ll need:
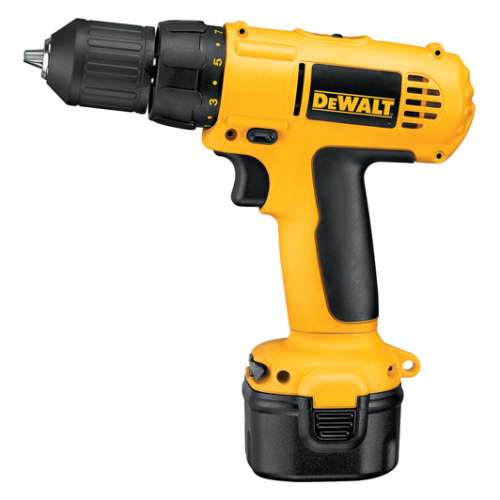
- A drill. A reliable, preferably cordless drill will make quick work of installing brackets or floating shelves.
- A screwdriver. Depending on your fixings, you might need a Phillips or flat-head screwdriver.
- Spirit level. This will ensure your shelves are perfectly straight.
- A tape measure. Accurate measurements are key to a successful installation.
- A stud finder. Helps locate the studs in your wall for stronger fixings.
- A pencil. For marking your measurements and alignment.

Building a shelf vs installing a shelf
Are you building your shelf from scratch, or are you assembling and installing a premade one? Building your shelf can be a rewarding DIY endeavour, allowing you to completely customise the size, style, and finish to fit your unique space and personal taste. It’s a great opportunity to use leftover materials and express your creativity, but it does require some woodworking skills and a bit more time.
On the other hand, if you’re looking for a quicker and simpler solution, premade shelves are convenient and easy to install. They come ready to mount with brackets and hardware included, making them perfect for fast home upgrades. With a variety of materials, styles, and finishes available, you can easily find a shelf that complements your décor.
A quick rundown of the key jargon
Before we dive into the shelf installation, let’s take a look at some of the jargon that’s going to be used. Terms like “bracket,” “stud,” and “load-bearing” will pop up often, so having a clear understanding of what they mean will make it easier to follow along if this is your first time putting up a shelf.
- Brackets support the shelf and are available in various styles and materials.
- Studs are the vertical wooden supports behind your drywall that provide strong anchoring points for your shelves.
- Wall anchors are essential for fixing shelves into drywall when studs aren’t available, ensuring your shelves are securely mounted.
- Floating shelves are shelves that appear to “float” on the wall without visible support, offering a modern and minimalist look.
- Load-bearing refers to shelves or brackets designed to support significant weight without compromising stability.
 Safety first
Before you dive into your project, keep safety in mind. Always wear safety goggles to protect your eyes from dust and debris. If you’re using a ladder, ensure it’s stable and on level ground. Also, don’t forget to check for any electrical wires and plumbing behind the walls before you start drilling.

How to make sure your fixings are strong
If you need your shelf to hold weight like books or tools, you’ll need a strong fixing. Start by locating the studs in your wall using the stud finder, marking their positions with a pencil for easy reference. For heavier loads, use wood screws that penetrate through studs, providing a strong anchor point. If you’re working with drywall alone, you’ll want heavy-duty wall anchors since they’re designed to give that extra support when studs aren’t present. Pre-drilling your holes before you try to install them on the wall is also recommended to prevent the wood from splitting.
Shelving materials and brackets
When it comes to choosing the material for your shelf, style and functionality both matter. Wood is a classic option that offers versatility since it can be stained or painted to match your décor. Brackets come in various styles; concealed brackets create a minimalist appearance, while decorative brackets can add character and flair to your shelving setup – it all depends on what look you’re going for.

How to put up a fixed shelf
To install a fixed shelf, first start by using a wall scanner to ensure there are no wires or pipes where you plan to install your shelf. Then, you can start measuring and marking your desired height and width. Use a spirit level to draw a straight line where the brackets will be attached. Next, install the brackets to the wall using screws, ensuring they’re level to support the shelf evenly. Once the brackets are securely in place, simply place the shelf on top and adjust it if necessary.
How to put up a floating shelf
As with a standard shelf, the first step to putting up a floating shelf is to check with a wall scanner to ensure you won’t drill into any wires or pipes – check out our range of Detector equipment here. After that, the actual job begins with finding the right spot on your wall. Use a level to mark the location accurately. Most floating shelves come with a mounting bracket; you’ll want to secure this bracket to the wall with screws, and use the spirit level to ensure it remains flush. Once the bracket is in place, all you need to do then is slide the shelf onto it according to the manufacturer’s instructions!

At Smiths Hire, we have more than 50 years of experience behind us. We pride ourselves on providing an unbeatable service to customers both here on our website and from our 18 tool hire depots in North West and Yorkshire, including in a variety of major cities such as Manchester (Openshaw & Trafford branches), Liverpool and Leeds! If you need any help choosing the right tools for your next DIY, feel free to ring our friendly team on 0333 323 2100; we’ll be happy to help in any way we can!

 SPEAK TO US

 My Account


