Laying paving is an excellent way to elevate the visual appeal of your outdoor space. A patio is the perfect spot for entertaining guests or simply sitting and enjoying your garden with a cup of tea! Laying paving can actually increase the value of your property, making it a worthwhile investment beyond all its practical and aesthetic perks. So, if you’re looking to lay some paving in your garden, whether you’re a DIY enthusiast or a trade professional, we’ve got everything you need to get the job done.
At Smiths Hire, we’ve been the reliable choice for tool hire in the UK for over five decades. Our commitment to delivering top-notch customer service is matched by our extensive range of dependable tools and equipment, including everything you need to lay paving. So, let’s dive right in!

Order your paving stones
Before you start creating your dream patio, the first step is to order the perfect paving slabs. If you’re feeling unsure about the number of paving slabs you might need for your garden, don’t stress. We’ve got you covered with an easy-to-follow guide that will help you calculate the area of your outdoor space. This way, you can figure out exactly how many paving slabs are required to cover your patio area without any hassle!
Prepare the garden or space
Now that you have all the paving stones you need, it’s time to prepare the area for laying them down. First, mark out the area where you plan to lay the slabs and do a dry run. This means laying the stones down on the ground without any cement or adhesive to check if you have enough and if the layout looks good. If you’re happy with how everything looks at this stage, you can move on to prepping the ground. Before you start digging, ensure there are no pipes below the ground where you want to lay your patio.
Assemble your toolkit
Now that you’re fully prepared to start preparing the ground for your paving slabs, it’s time to assemble your tool kit. This is where we come in. Whether this is a personal or professional project, we offer a convenient tool hire service that ensures you have the right tools for the job. With our service, you can get what you need when you need it, and when you’re finished, simply return it!
Here’s what you’re going to need to lay your paving:
- Shovel
- Rubber mallet
- Spirit level
- Pointing trowel
- Spacing pegs
- Small wooden pegs
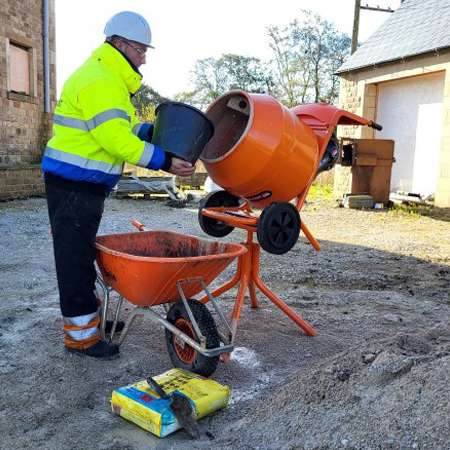
- Cement mixer
- Concrete breaker (optional)
- Mortar (sharp sand, water and cement)
- sub base
- PPE – safety goggles, dust mask, gloves

Clear the area
Once you’ve assembled your tools, it’s time to prep the area for your sub base. If you’re pulling up existing patio slabs, you may need to hire a concrete breaker. You’ll need to dig deep enough so that your sub base, mortar and your paving slabs will lay flush in the space. If your patio is next to your home or business, take care to ensure that your slabs sit at least 150 mm below the damp-proof course line.
Start laying your sub base
To prepare the space for your sub base, you may need to use a rubber mallet to hammer small wooden pegs into the ground. These pegs should be placed in lines across the area where you want to lay your sub base. Hammer them in at the height where you want your sub base to sit, leaving 100mm of peg above the surface if you want your sub base to sit at that height, for example. This will help you lay your sub base material evenly.
Remember that it is essential to allow space for water drainage when building a patio. To ensure proper drainage, a fall ratio of 1:80 is the industry standard. This means that for every 80 units of distance, there should be a 1-unit drop. So, when placing wooden pavers into the ground, keep this in mind.
To calculate how much fall you need to leave on your patio, you can use this simple formula. For example, if your patio is 5 metres long, you need to divide 5 by 80, which gives you 0.0625. This means that your patio should have a total fall of 6.25cm. You can apply this to the size of your patio for your measurements.
Mix your mortar
Always put on your safety gear before mixing any mortar, so suit up in your goggles, dust mask and safety gloves and get ready to mix. If you want to read up on how to handle cement safely before you get started, we have just the blog for you!
You can mix mortar by hand but for an even mix, we recommend that you use a cement mixer. Add a generous amount of water (around half a bucket) into the mixer and add a ratio of 4:1 using sand and cement. Let it mix, and then add more sand and water as/if necessary. It should be stiff but pliable and not crumbly to the touch.

Lay the stones
Once you’ve got your sub base down and you’ve left adequate space for water drainage, you can start laying your stones! It’s important to lay your first paving stone strategically. It needs to be laid at the highest point of your patio, or if you’re lying next to a building, start there.
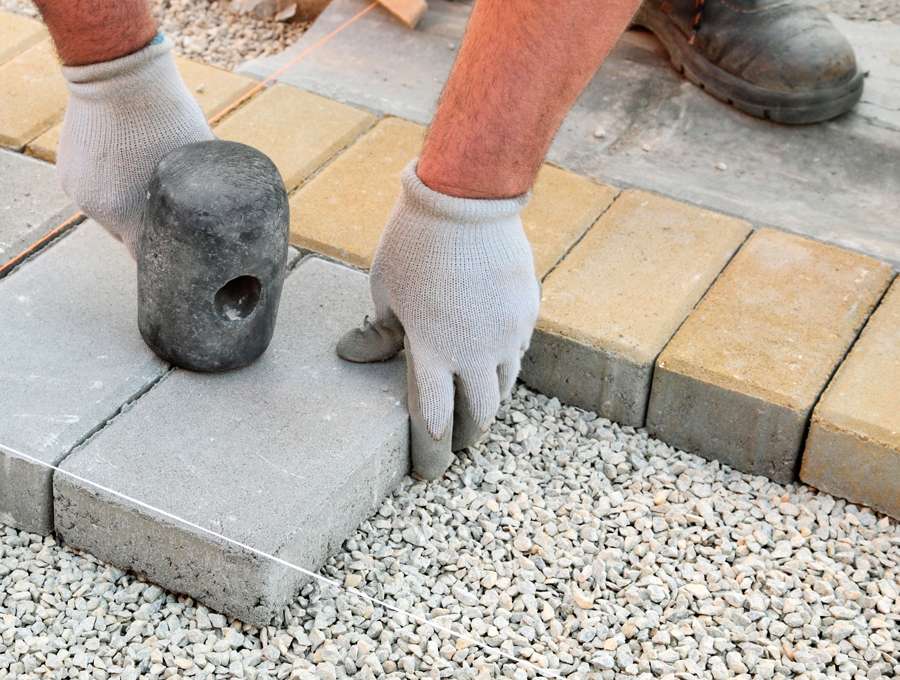
Remember, the first stone determines the rest of your patio, so it needs to be right! Lay a patio slab-sized amount of mortar down, not too thin and not too thick, and gently wet the back of the stone before gently placing it down. Then place something thick like a small plank of wood onto the stone and give it a few taps with the rubber mallet to even out the mortar underneath. If there are any gaps in the mortar underneath the paving slab use a pointing trowel to fill them in.
Now you’ve laid your first stone the rest should be a breeze! Start your first row by following the direction of the fall, using your spacers between each slab and occasionally checking the stones with a spirit level to make sure everything is even. Repeat this until your patio is laid and you’re done!

We’ve been providing quality equipment and tool hire services from our 17 tool hire depots across the North West and Yorkshire (including major cities like Manchester, Liverpool and Leeds) for years at Smiths Hire. If you have any questions or want any help or advice, don’t hesitate to call our team on 0333 323 2100!

 SPEAK TO US

 My Account


