 SPEAK TO US
 My Account


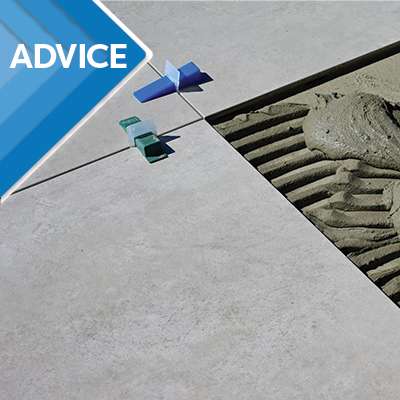
Grouting is the final step in tiling, and while it may seem daunting if you’ve never attempted anything like this before, it’s a straightforward task that even beginners can tackle. Whether you’re finishing a kitchen backsplash or a bathroom wall, proper grouting makes all the difference in giving your tiles a clean, polished look. With our easy steps, you’ll achieve a professional finish and ensure your tiles stay in place for years to come!

At Smiths Hire, we’re your trusted DIY partner, here to make sure you get the job done right. With over 50 years of experience in tool hire, we’ve built up the knowledge to supply you with the right tools and offer expert advice, ensuring you have everything you need for your project. Whether you’re a seasoned pro or just starting out, we’re here to help. So, with that in mind, let’s get started!
A step-by-step guide to grouting
Before we dive into the steps, you need to make sure you have everything you need to get the job done. Luckily, everything you need is relatively easy to get a hold of. The first thing goes without saying – grout. Grout comes in various forms, like powdered or ready-mixed, and you can choose which you’d rather use. If you’re confused, you can always ask the team at your local DIY shop for assistance.
Here’s a list of everything you’re going to need:
- Grout
- Bucket
- Grout float (the tool designed to apply grout in the spaces between tiles)
- Grout sponge
- Grout finisher
- Cleaning cloth
Once you’ve got everything you need, you can get started on preparing your space. Lay down your dust sheets or protective covers to protect your flooring, furniture, or bathroom. Then you’re good to get started!
Mix your grout
Start by mixing the grout in a bucket. If you’re using powdered grout, add water until you get a smooth, creamy consistency. Don’t over-mix, as it can cause air bubbles. Only mix enough grout that you can use in 30 minutes, as it will start to dry out after that.
Apply grout to the joints
Use a grout float to apply the grout to the gaps between your tiles. Hold the float at a slight angle and press the grout into the joints. Work in a diagonal motion, and scrape off any excess grout as you go.
Clean off any excess grout
Once the grout is in the joints, take a damp tile sponge and wipe off any excess grout from the tile surface. Make sure the sponge isn’t soaking wet; you want it just damp enough to clean without removing grout from the joints.
Smooth the joints
After about 20-30 minutes, once the grout starts to set, use a grout finisher to smooth out the grout lines. This will help give the joints a clean, even finish.
Remove the Powdery Residue
As the grout dries, a powdery film will start to form on the tiles – this is normal. Just wait a few hours for the grout to set, and then use a clean cloth to buff off the powder, leaving your tiles looking fresh and clean.
A little tip
Make sure to give your tile adhesive enough time to fully dry – usually about 24 hours – before you start grouting. Rushing it can shift your tiles and leave you with an uneven finish. It’s also a good idea to choose a day with decent airflow, and steer clear of grouting when it’s really cold or damp, as that can slow things down!

If you’re planning to take on any other DIY jobs – big or small – Smiths Hire is here to help. From decorating and floor prep to gardening and plumbing and more, our tool hire service has you covered every step of the way. With over 50 years of experience and 18 depots across the North West and Yorkshire, including Manchester, Liverpool, and Leeds, it’s easy to get what you need when you need it. Got a question? Just give our friendly experts a call on 0333 323 2100 – we’re always happy to help you get stuck in.